

Create an agent
- As an owner or a super administrator, go to Network settings > Agents.
- Click Create agent.
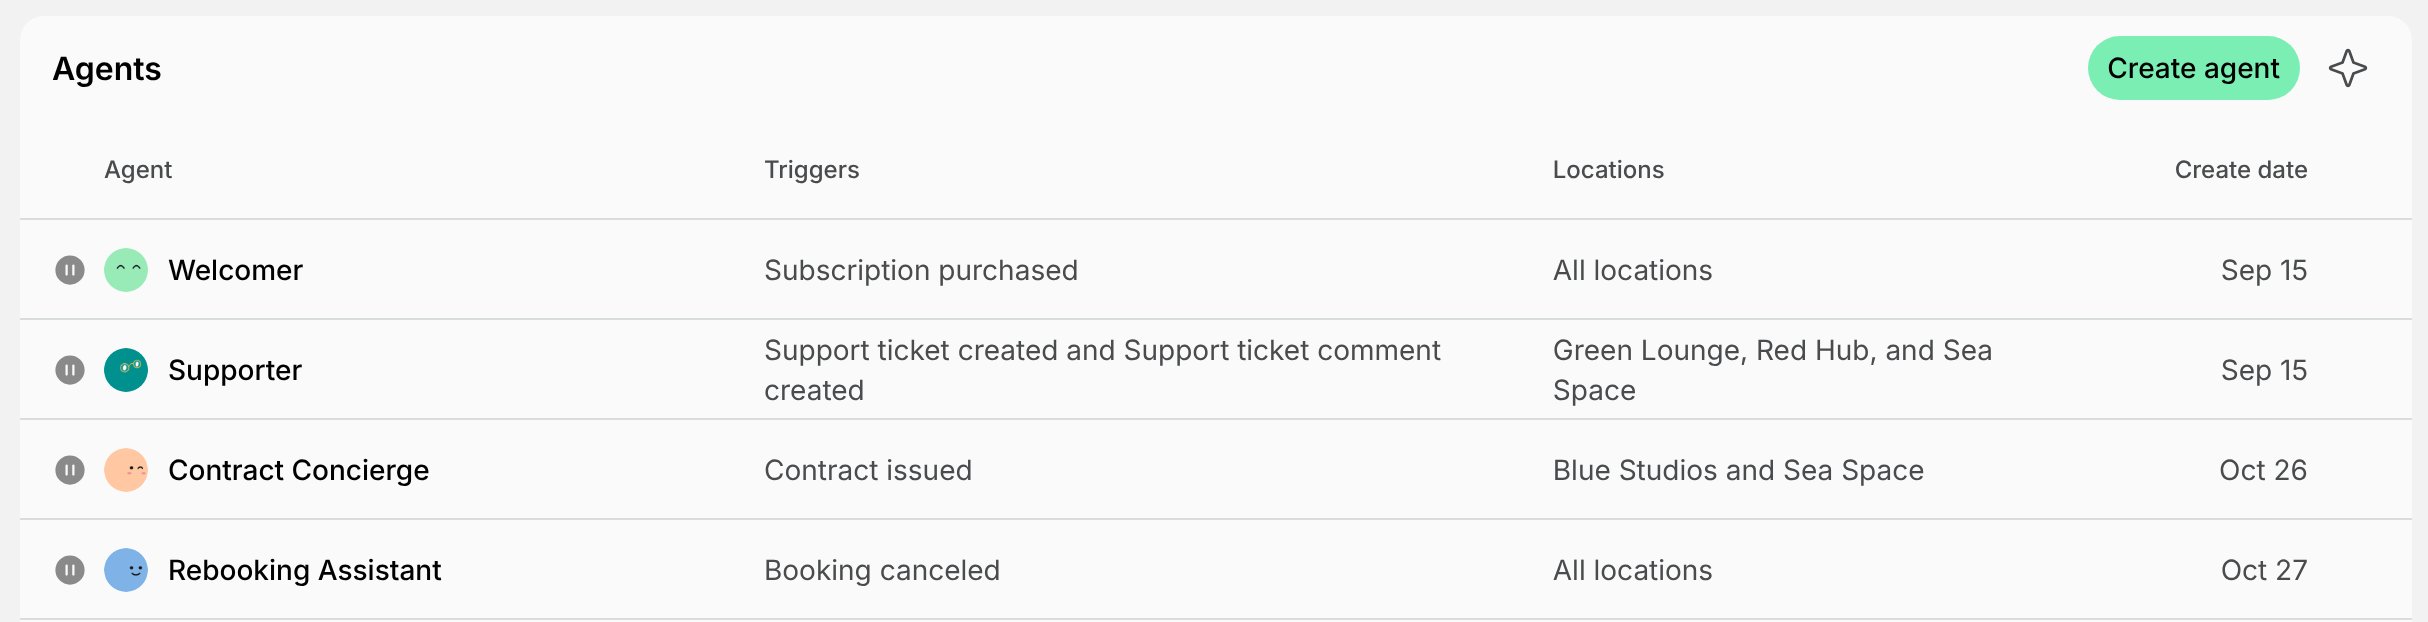
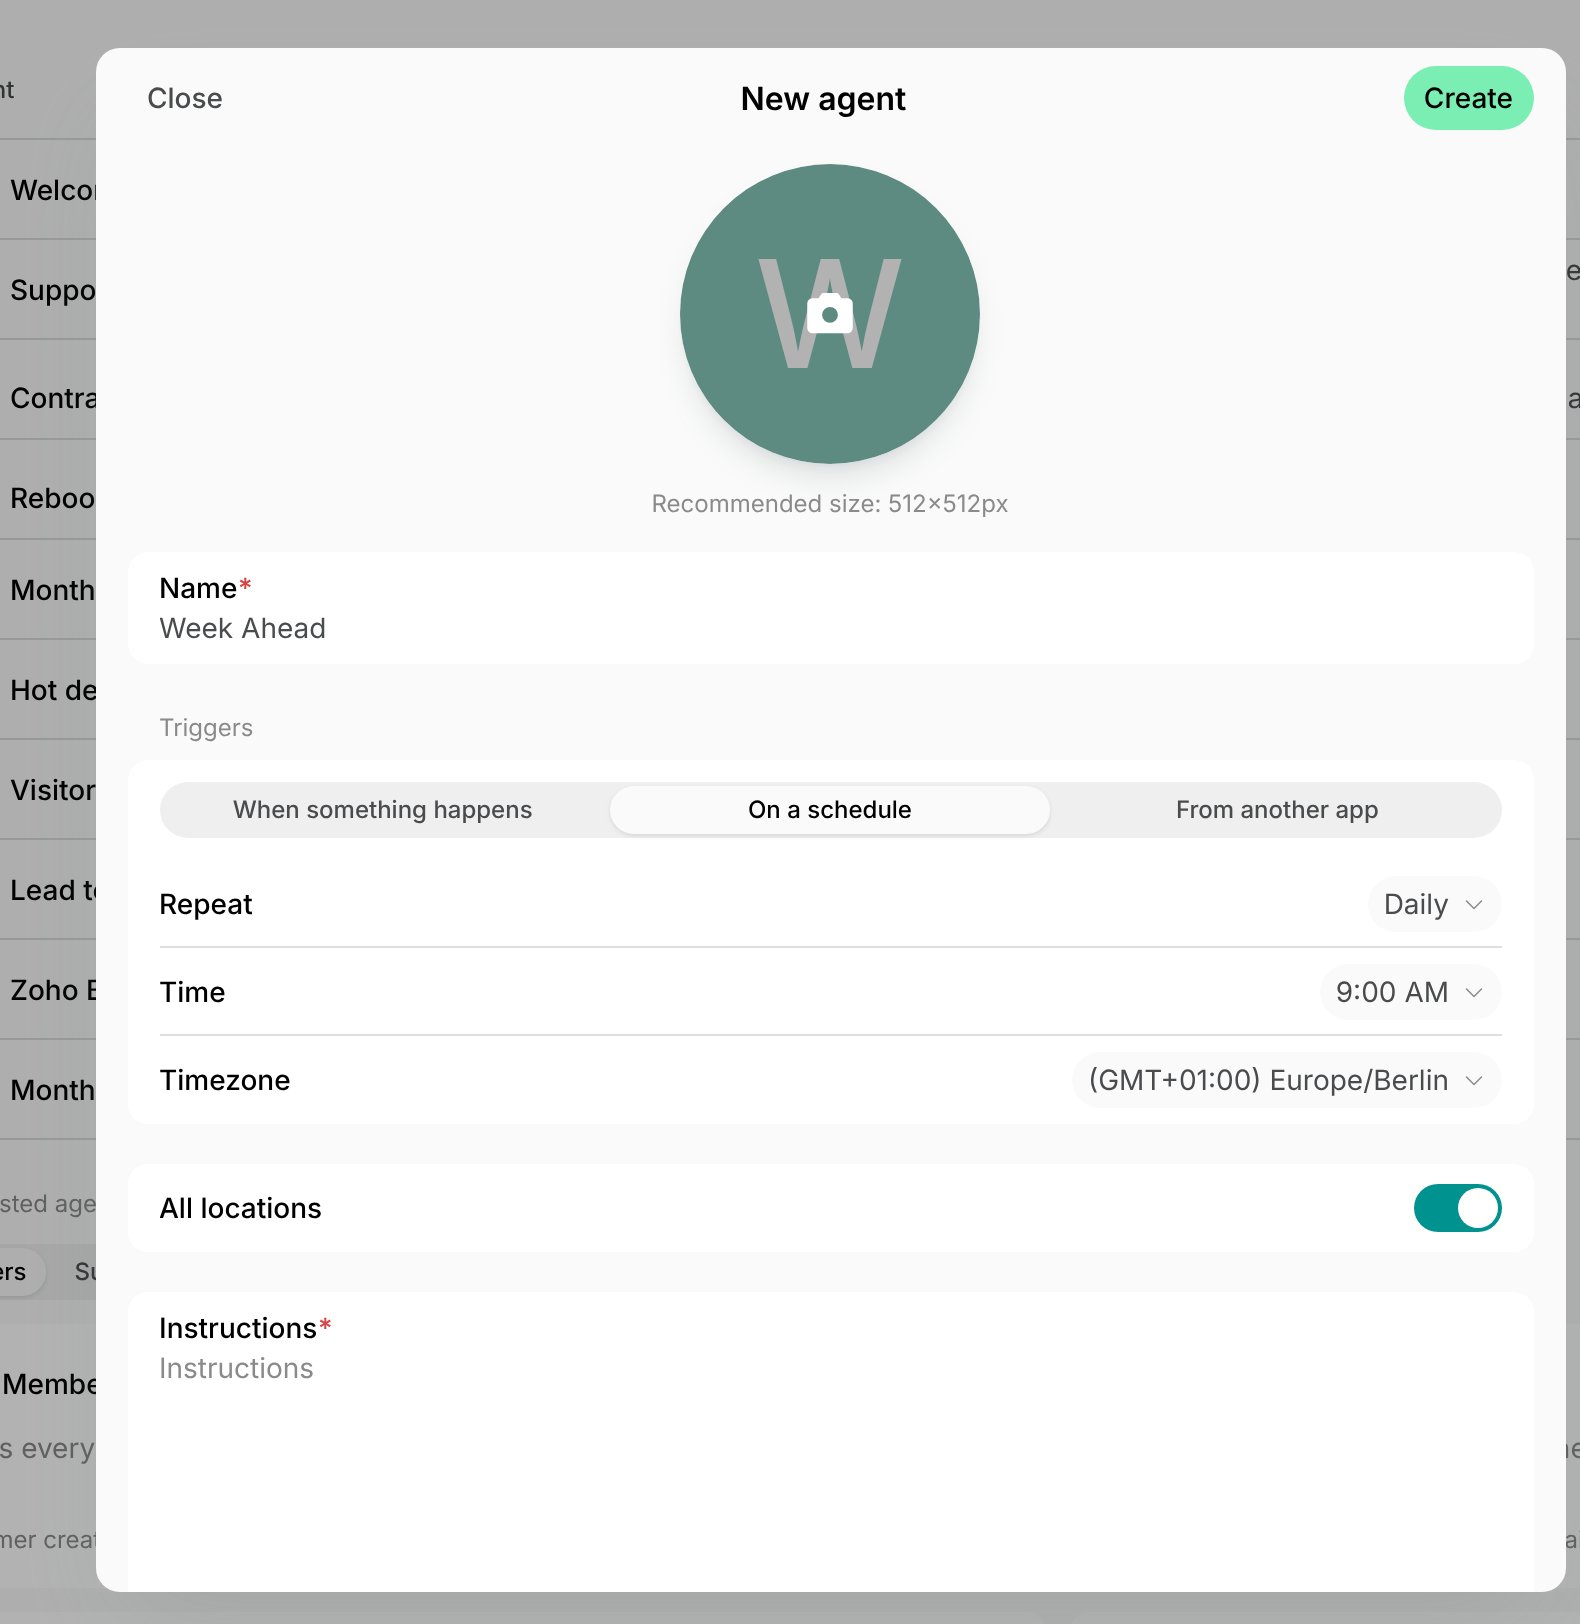
- Enter a Name and add a photo. Members see them on anything the agent publishes, such as a feed post, so choose something your team and members will recognize, such as “Front Desk” or “Billing Assistant”.
- Under Triggers, choose when the agent runs:
- When something happens, then select what starts the agent in Events. Start typing to search the list. Select one event for one job, such as Contract signed to email the customer what happens next, or several events when the agent does the same thing for each, such as Booking created and Booking updated.
- On a schedule, for work that repeats at a set time, such as a daily check of unpaid invoices. Set Repeat to Daily, Weekly with the weekdays to run on, or Monthly with the day of the month, from 1 to 28, then the Time and Timezone to run at.
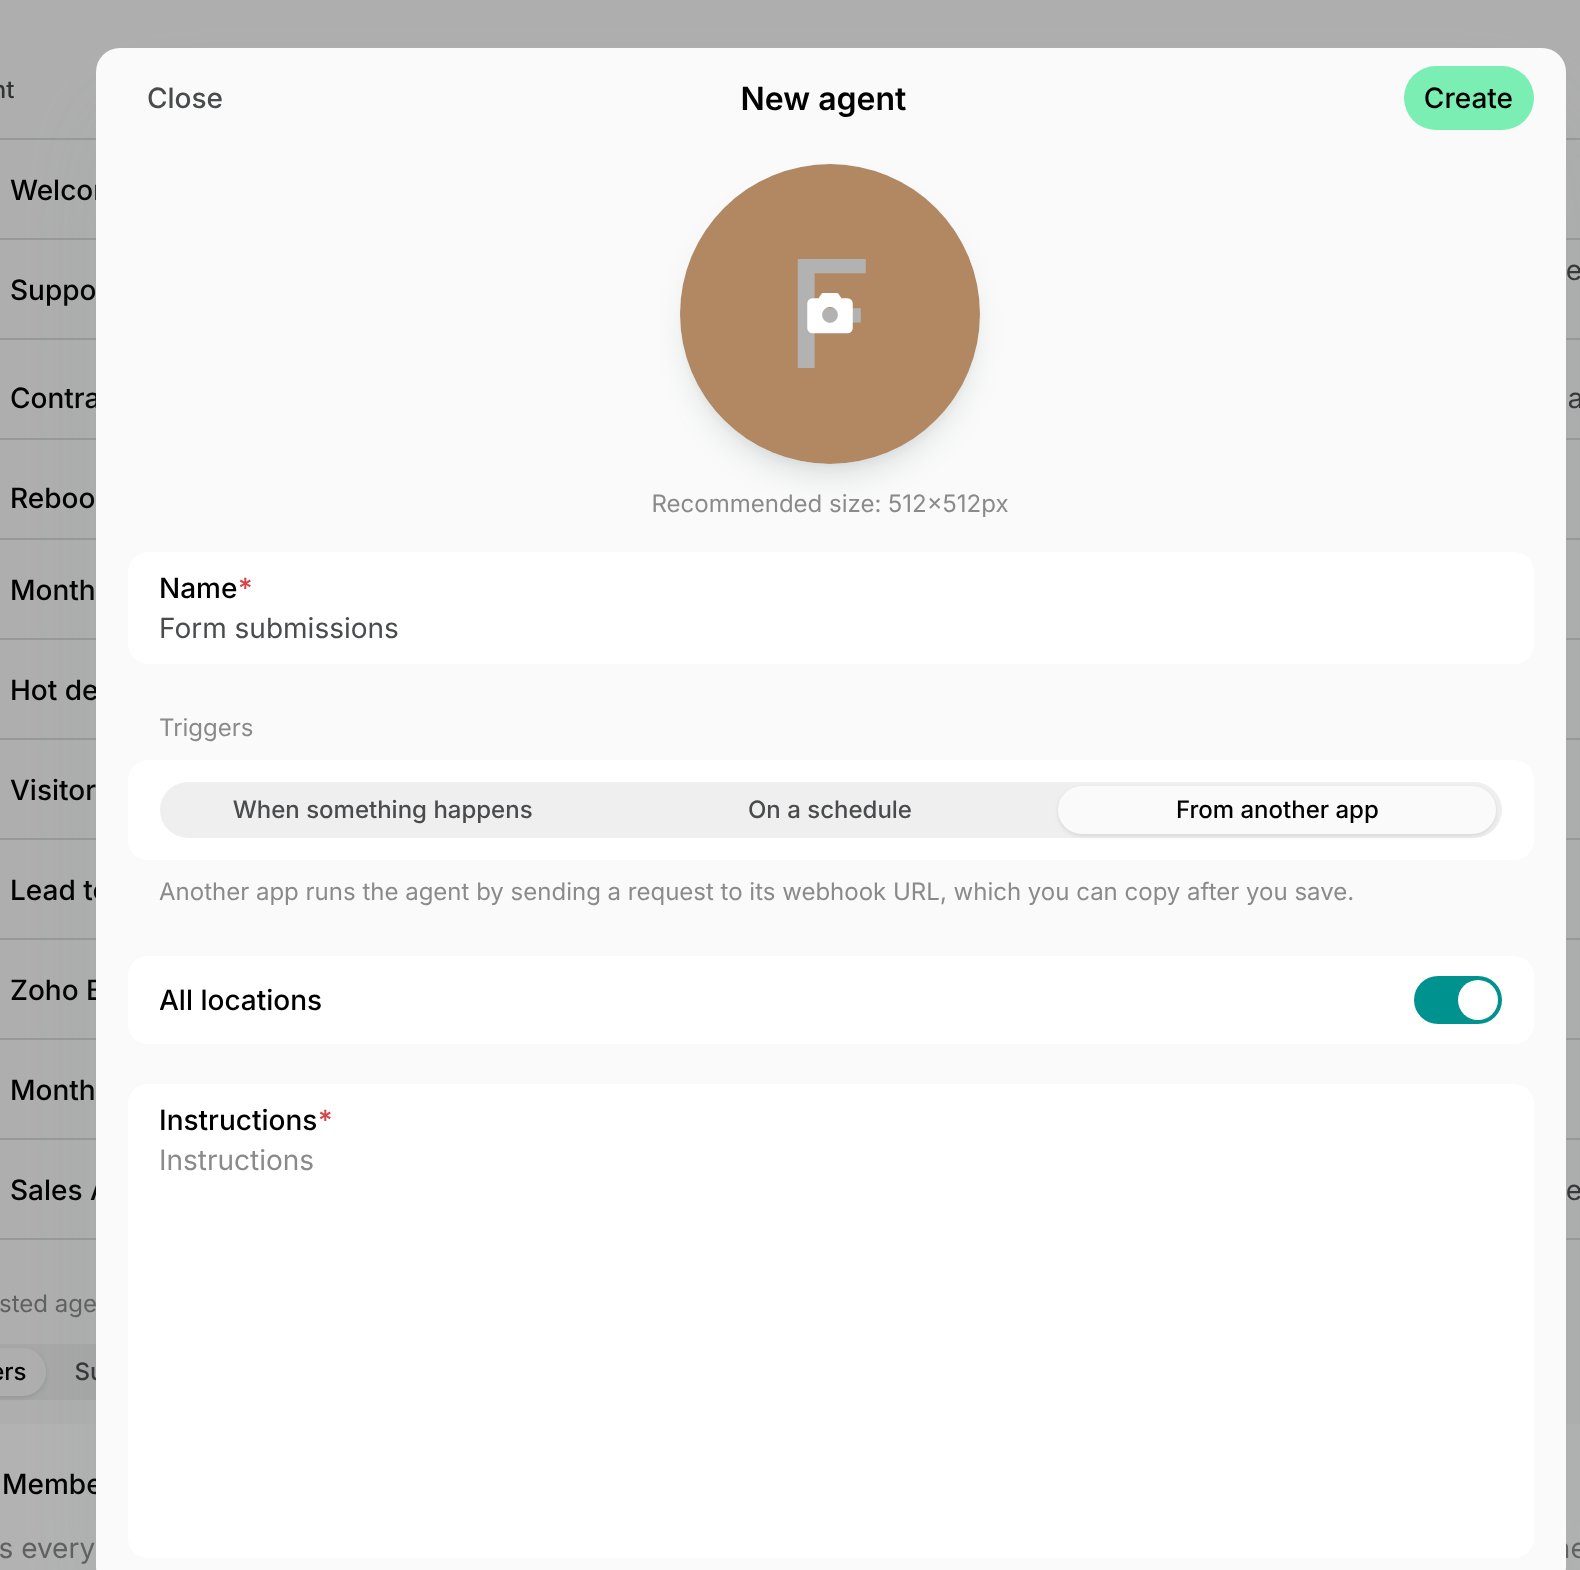
- From another app, for something that happens outside Spacebring, such as a form submitted in your form tool or a deal won in your CRM. After you create the agent, paste its webhook URL into that app.
- Choose where the agent works:
- Keep All locations on for an agent that serves your whole network.
- Turn All locations off and select one or more Locations for an agent that serves only some of them — for example, a “Front Desk” agent for one location.
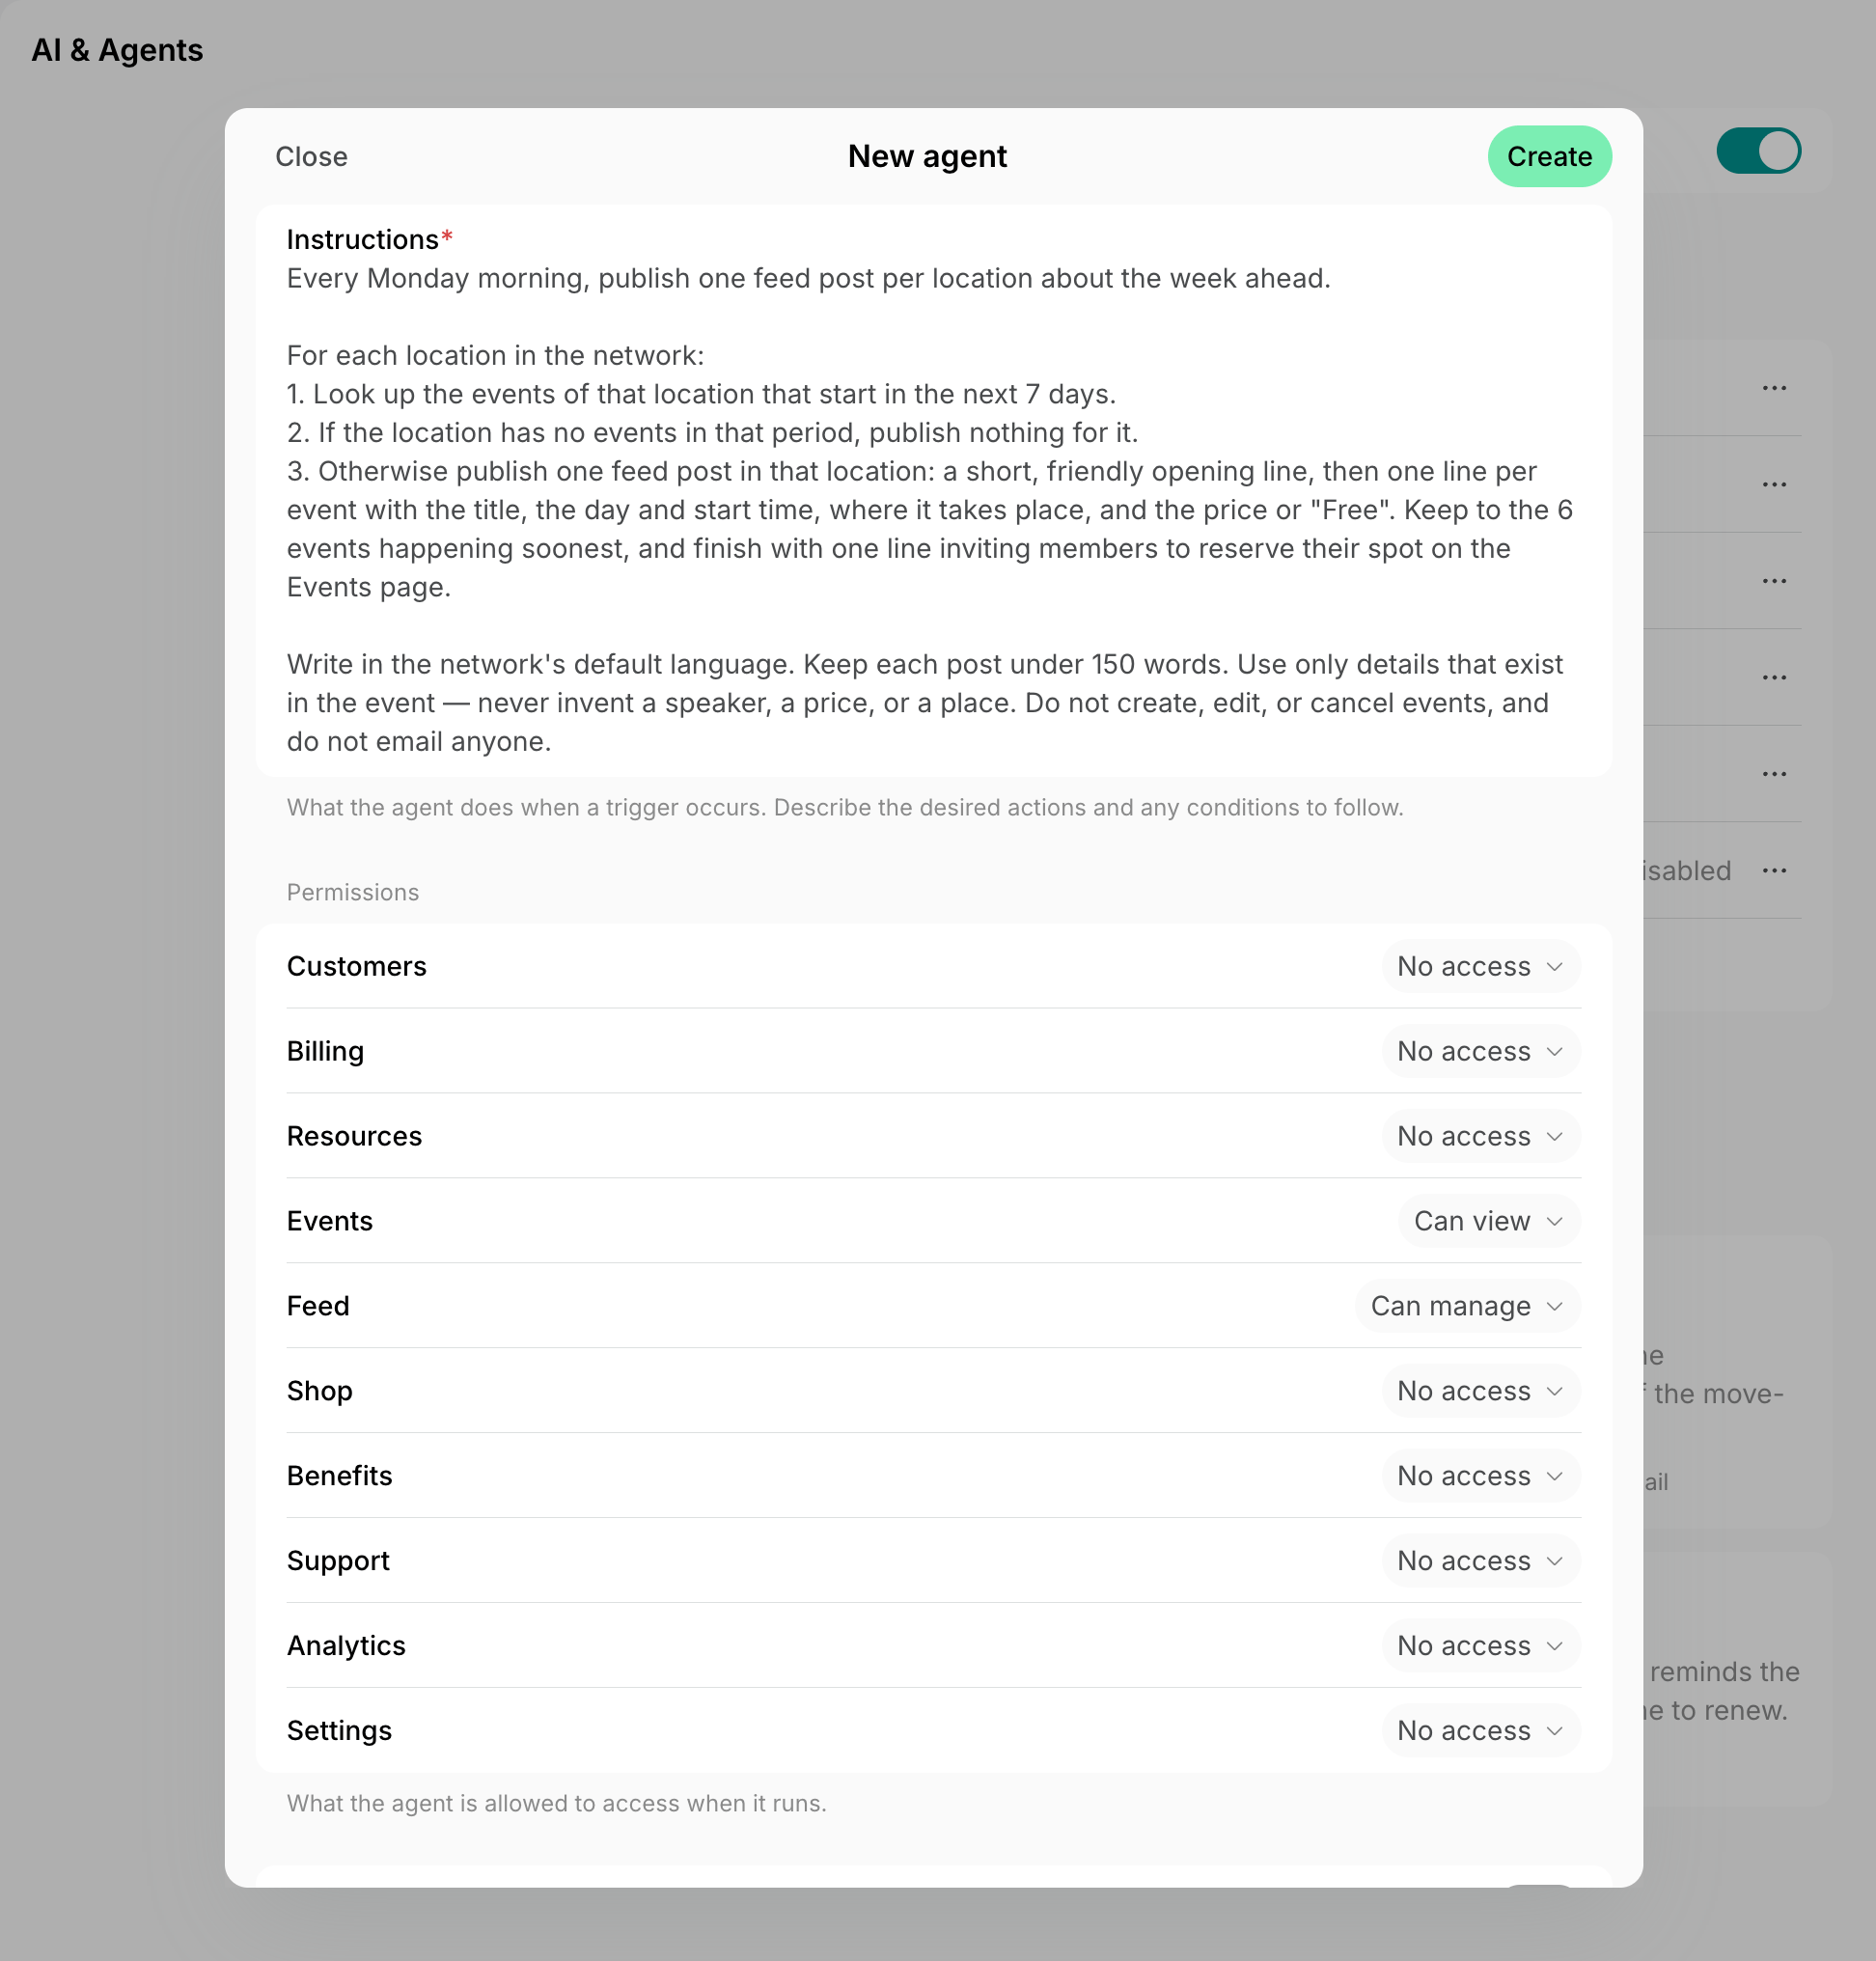
- In Instructions, describe what the agent should do.
- Under Permissions, choose Can manage for every area the agent changes, and No access for the areas it shouldn’t see.
- Click Create. The agent is enabled and starts working on its next trigger. To create it without running it yet, turn off Enabled first.
Triggers and agent examples
An agent set to When something happens runs each time one of its events occurs in the locations it works in, and gets the details of what happened — the booking, the invoice, the ticket. An agent set to On a schedule runs at its set time, such as every Monday at 09:00 to publish a feed post with the week’s events in each location, or on the 1st of each month to email an administrator a report on last month’s revenue and new members.Run an agent from another app
An agent set to From another app runs each time another app sends a request to the agent’s webhook URL, and gets the content of the request as the details of what happened, such as the answers to a form. Use it for an app that can call a URL when something happens in it, such as a form tool, a CRM, or an automation tool like Zapier or Make.- Create the agent with From another app under Triggers, and keep Enabled on.
- Open the agent on the Network settings > Agents page, and click the copy icon next to the webhook URL under Triggers.
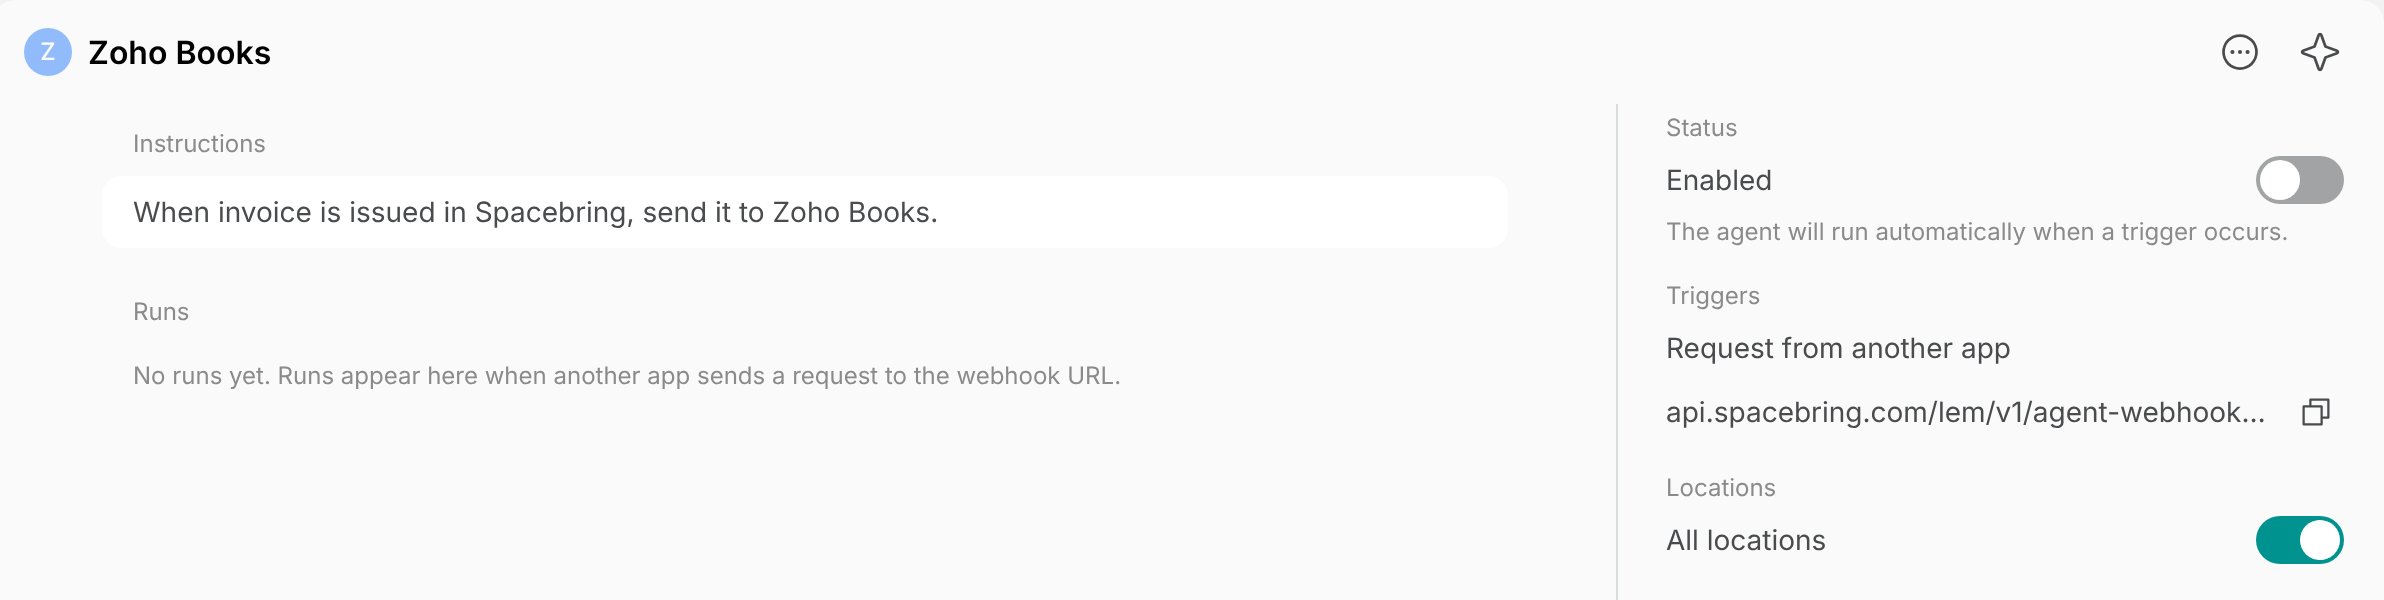
- In the other app, paste the URL where it sends a webhook when something happens, such as a “Send to webhook” step after a form is submitted.
- An agent that is turned off doesn’t accept requests, so turn it on before you test the other app.
- A request that the other app sends again doesn’t start a second run: one with the same delivery ID within a day, or with the same content within an hour.
- An agent runs at most 60 times an hour from requests, and a request can be at most 32 KB.
- Click a run to see the Request body the other app sent.
Instructions
The instructions are the agent’s whole brief: it sees which trigger started the run, the details that came with it, and the data in the areas you allowed. Write them the way you would brief a new team member:- Say what to look up first, such as the customer, the resource, or your location guides.
- Say what to produce and who gets it: an email to the customer or to an administrator, a feed post, an updated item.
- Say when the agent should do nothing, for example: “If the booking was canceled by an administrator, do nothing.”
- Say which language to write in, for example: “Write in the customer’s language.”
- Give one job to one agent. For a second job, create a second agent.
- Look up anything in your network, from customers and bookings to invoices, orders, events, visits, tickets, guides, sent emails, and settings.
- Email one customer of its locations or one administrator at a time, in your network’s branding.
- Prepare reports and email them to you or your team, with up to 5 CSV files attached to each email, one for each table.
- Publish and edit feed posts.
- Message people in chats and create group chats.
- Open support tickets, comment on and reply to them, and change their status, assignee, or type.
- Invite members, add nonmembers, create companies, edit customers’ billing details, notes, and payment settings, move members to a company or remove them from it, change their company role, remove members and companies, and delete nonmembers.
- Create, copy, and edit resources, products, events, benefits, guides, memberships, packages, discounts, currencies, and categories, and delete resources, memberships, and coupons.
- Book resources for customers, and change or cancel bookings. An agent doesn’t run again for a booking it created, changed, or canceled itself.
- Assign resources to customers for a period without a subscription, and change or remove those assignments.
- Change or cancel subscriptions and their items, and issue, re-date, terminate, or delete contracts.
- Create, issue, void, and delete invoices, change their items, and issue or void credit notes.
- Add or deduct a customer’s credits and day passes.
- Change location settings.
- Use the apps you connect to it.
- Search the web and the Spacebring documentation. An agent started by an event can’t open links or download files from them, so text that a member or visitor writes can’t make it send your data elsewhere.
Permissions
Each area has a level, the same as an administrator permission of that name: No access keeps the agent out of the area, Can view lets it look up data without changing anything, and Can manage lets it make changes. A new agent can view most areas, so set the Can manage permission where its job needs to make changes:- Customers — customer profiles and their data.
- Billing — contracts, subscriptions, invoices, memberships, and discounts.
- Resources — resources and bookings.
- Feed — posts and comments.
- Events — events and tickets.
- Shop — products, categories, and orders.
- Benefits — benefits, categories, and applications.
- Support — support tickets and guides.
- Analytics — occupancy and the other numbers on the Analytics page. It has only No access and Can view.
- Settings — location settings and integrations. It has only No access and Can manage.
Review runs
Every start of an agent is recorded as a run, and the AI usage of each run is charged to your network balance. Open an agent on the Network settings > Agents page to see its Runs, newest first.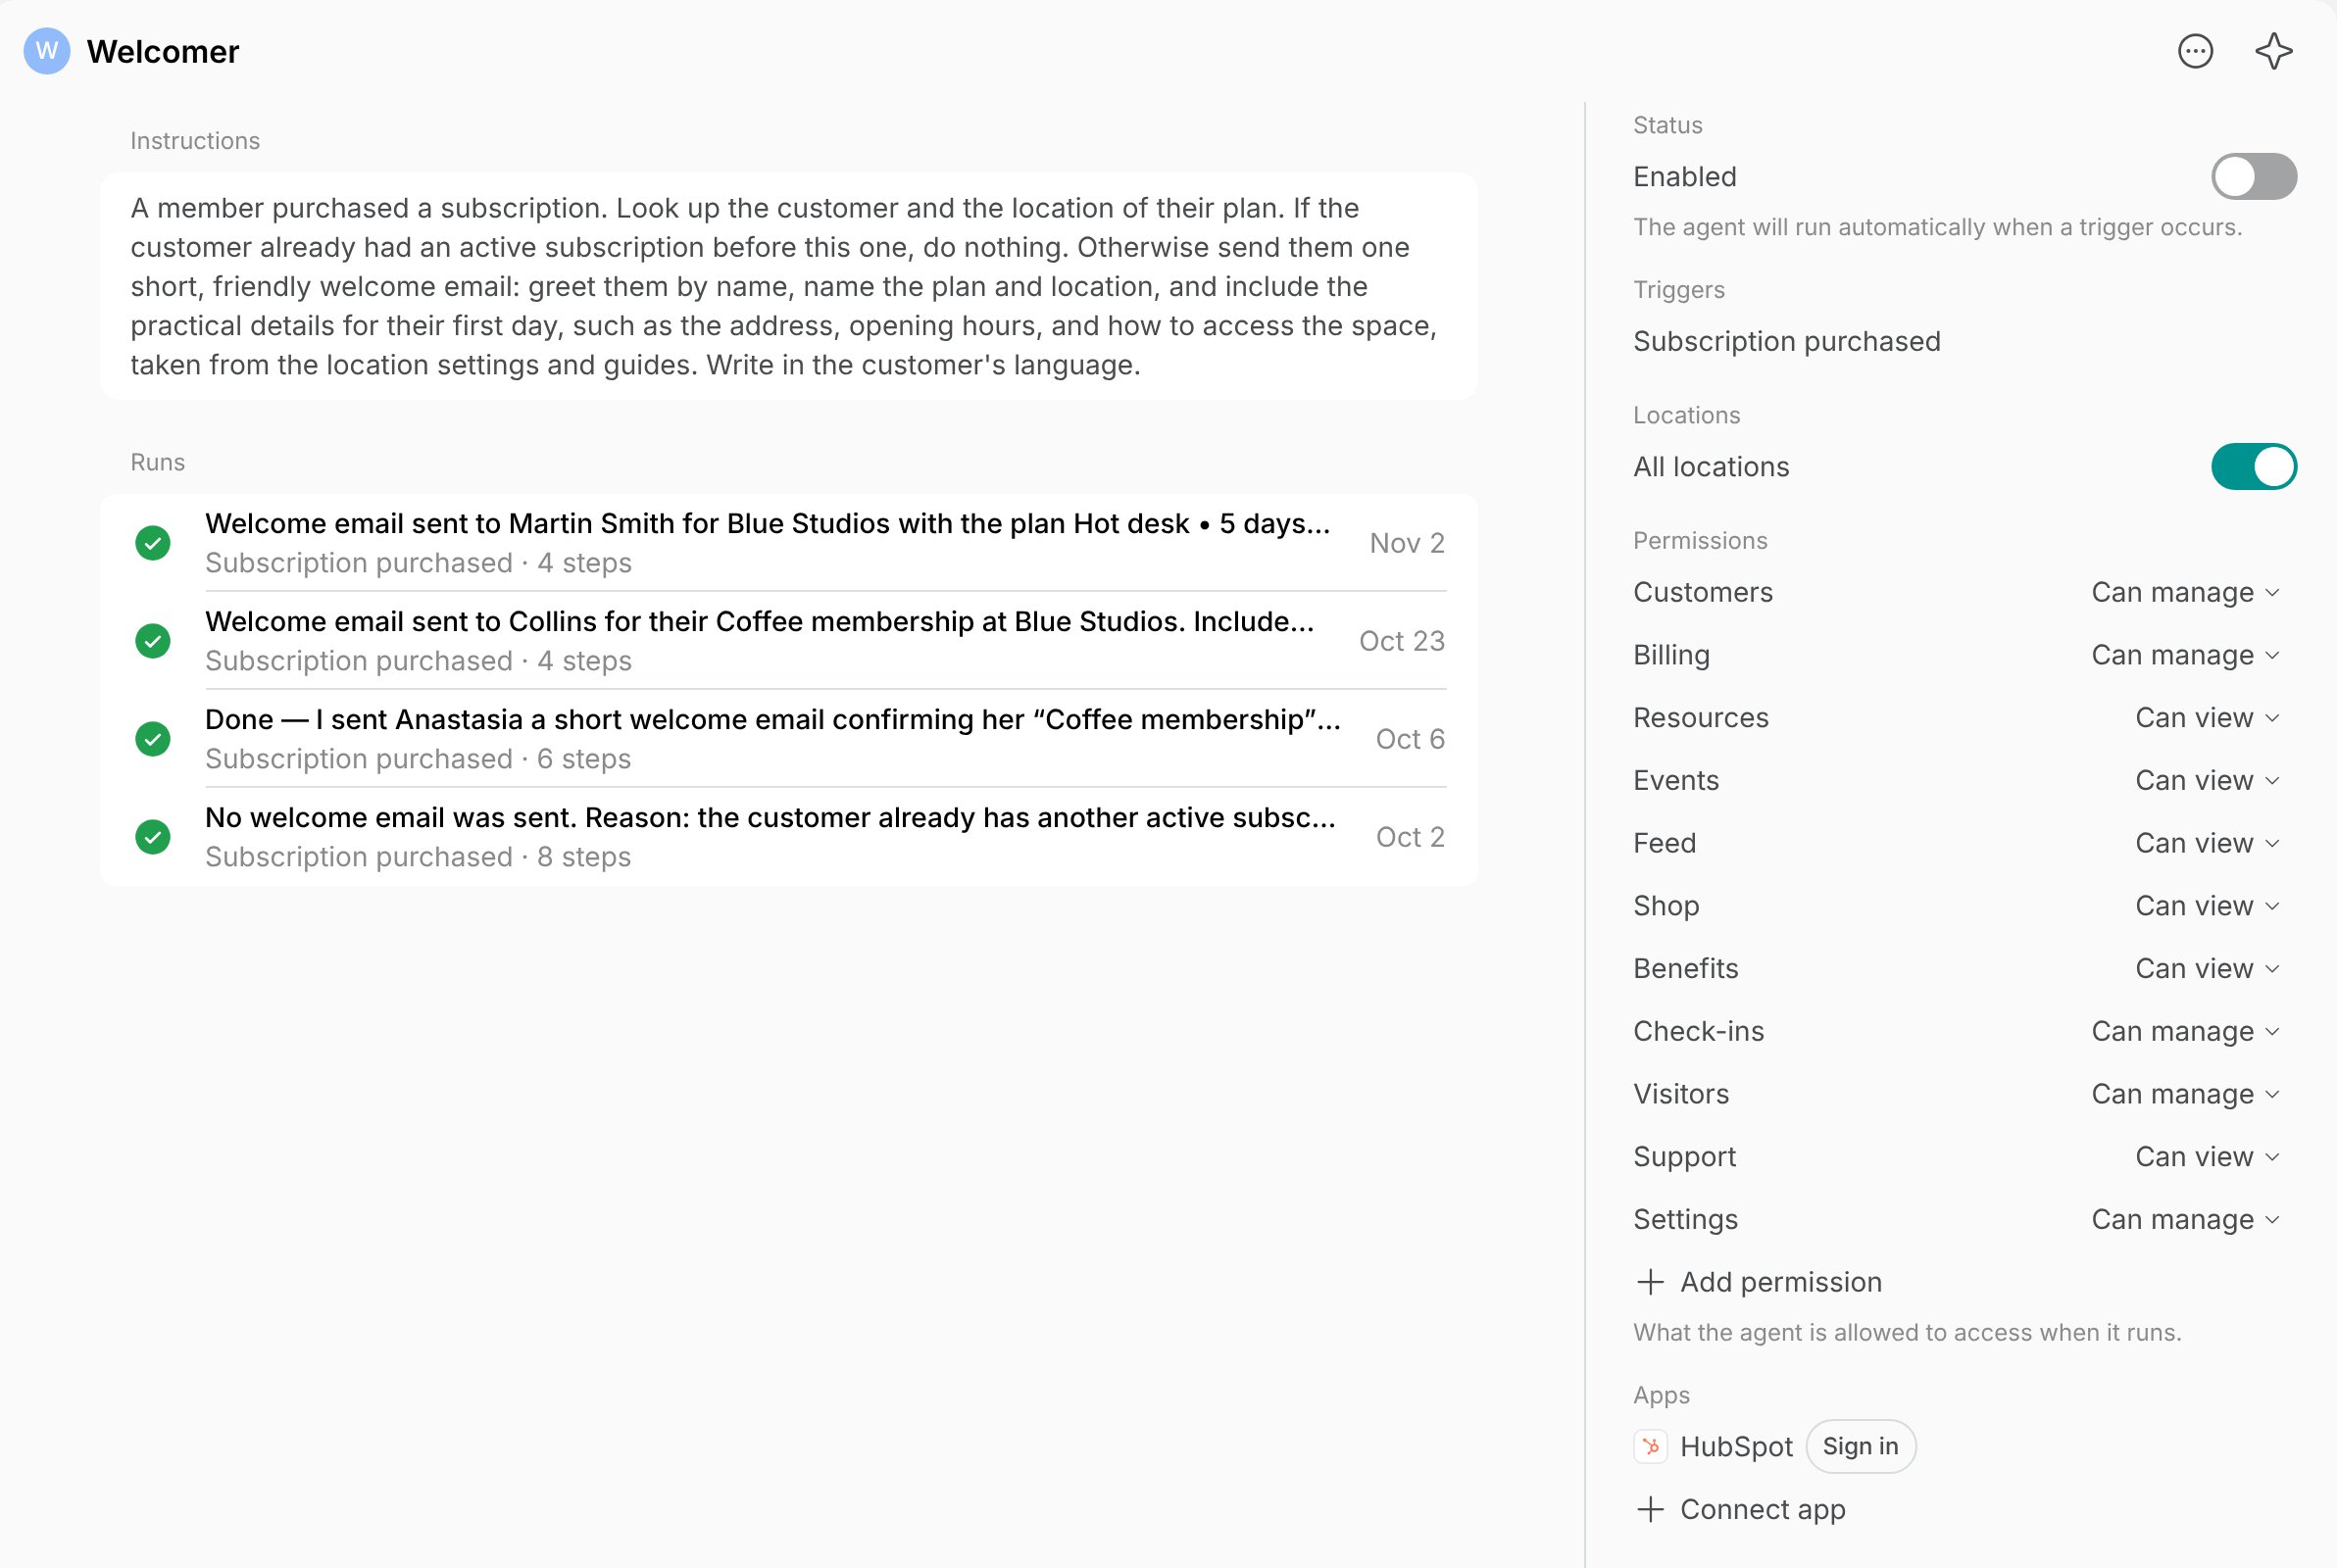
- A run shows what the agent said when it finished, the trigger that started it, how many steps it took, and when it ran.
- Running means the agent is still working, Completed that it finished, and Failed that it stopped with an error, which the run shows. A failed run isn’t started again, so the agent never repeats an email or a change it already made.
- Incomplete means the agent finished but couldn’t do part of its task — for example, the app it needs isn’t connected to it, or it doesn’t have permission for a location. The run says what was missing.
- Skipped means the agent didn’t run because your network’s balance ran out. Network owners are notified, and runs resume once the balance is topped up.
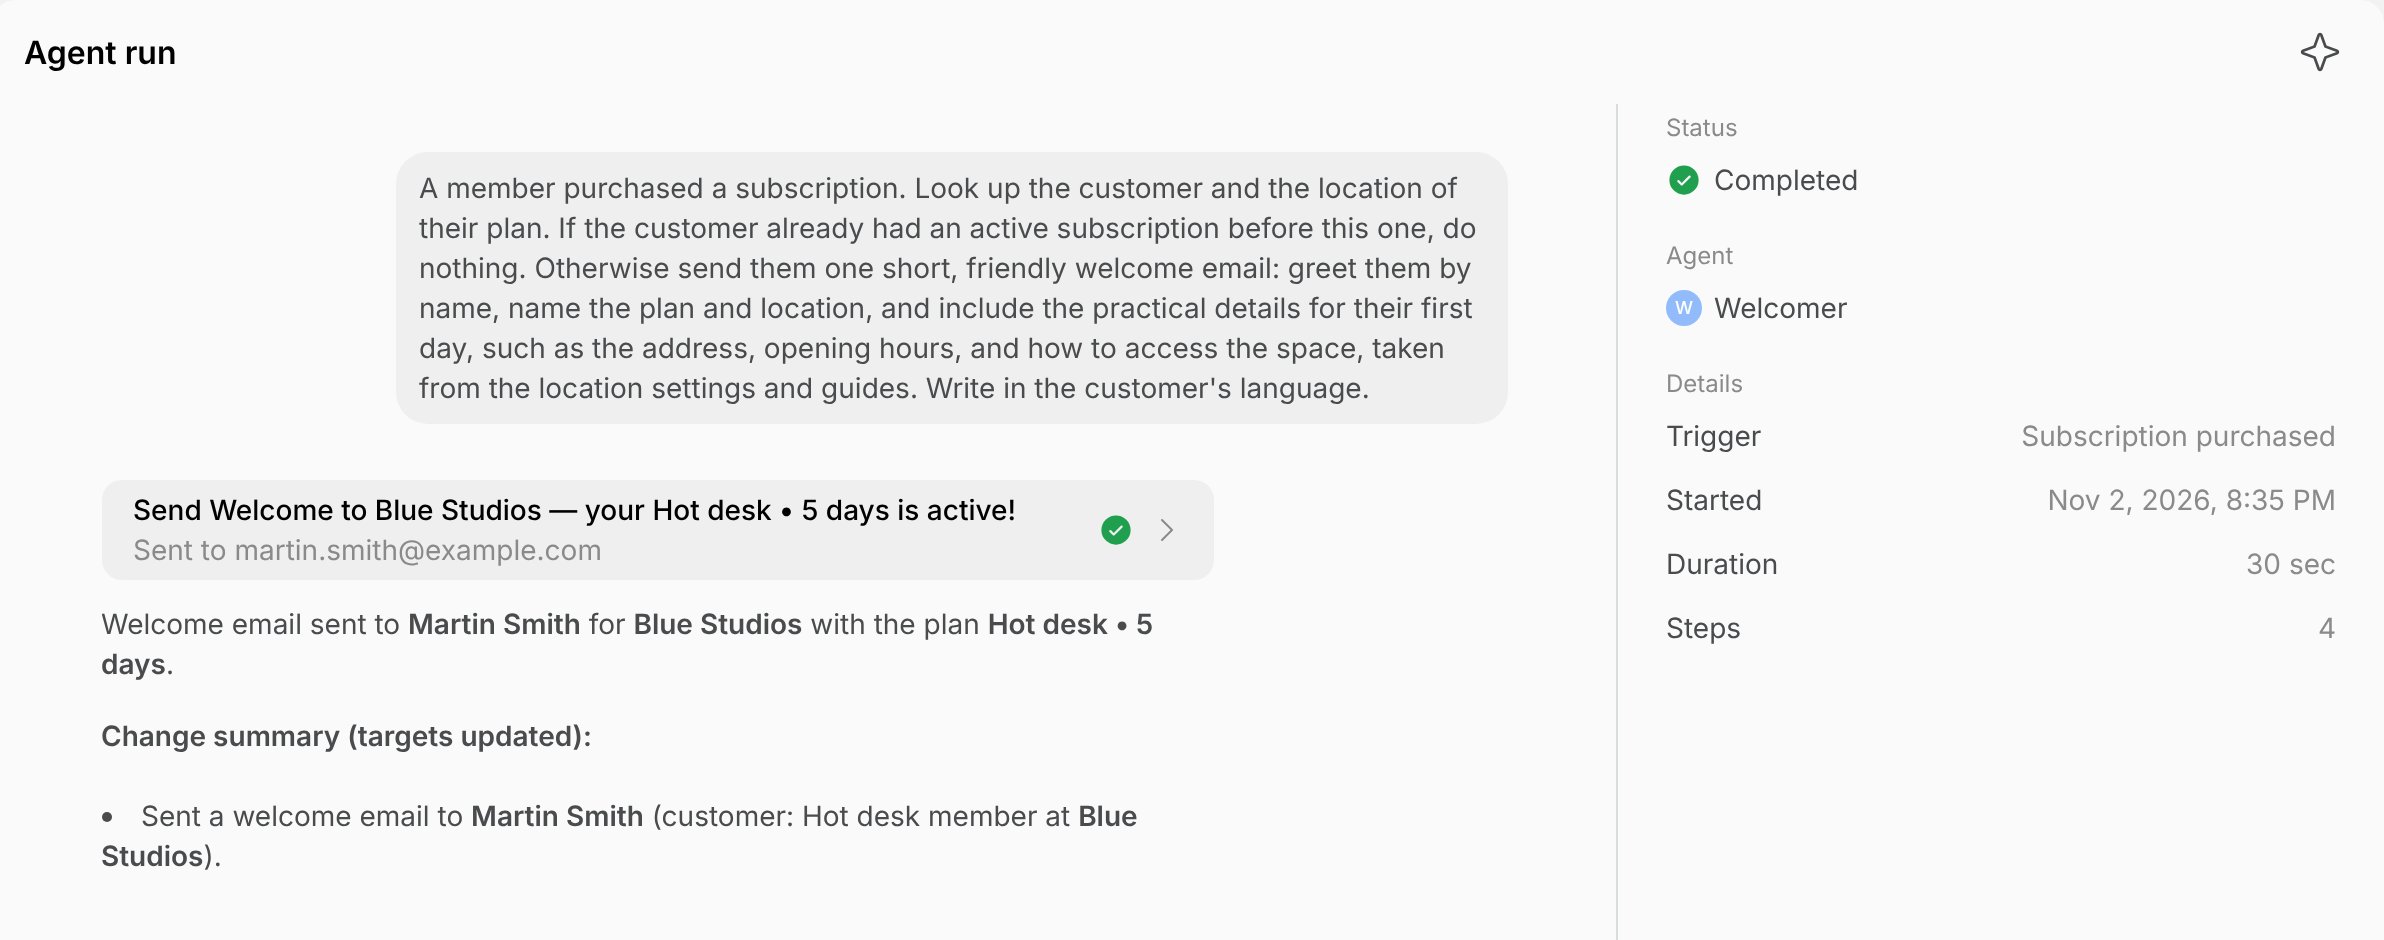
- Click a run to open its page. The conversation in the middle shows the instructions the agent followed, every change it made, the CSV files it wrote, and its full reply, and the sidebar on the right shows the run’s status, trigger, start time, duration, and number of steps. Each change shows what the agent did and to whom — for example, the subject of an email and the address it went to — and a failed run still lists the changes made before it stopped. Click a change to open what the agent created or changed, such as a booking, a contract, or a support ticket.
Manage agents
On the Network settings > Agents page, click the (…) menu next to an agent:- Disable stops the agent from running and keeps it in the list with its past runs. Enable starts it again.
- Edit changes the name, photo, triggers, schedule, and instructions. The agent’s next run follows the new setup.
- Delete removes the agent for good: it stops running and disappears from the list, and this cannot be undone.
- Enabled turns the agent on or off.
- All locations, or the locations under it, choose where the agent works.
- Each area under Permissions has its level. Click Add permission to give the agent an area it has no access to, and choose No access to take one away.
How agents appear in your network
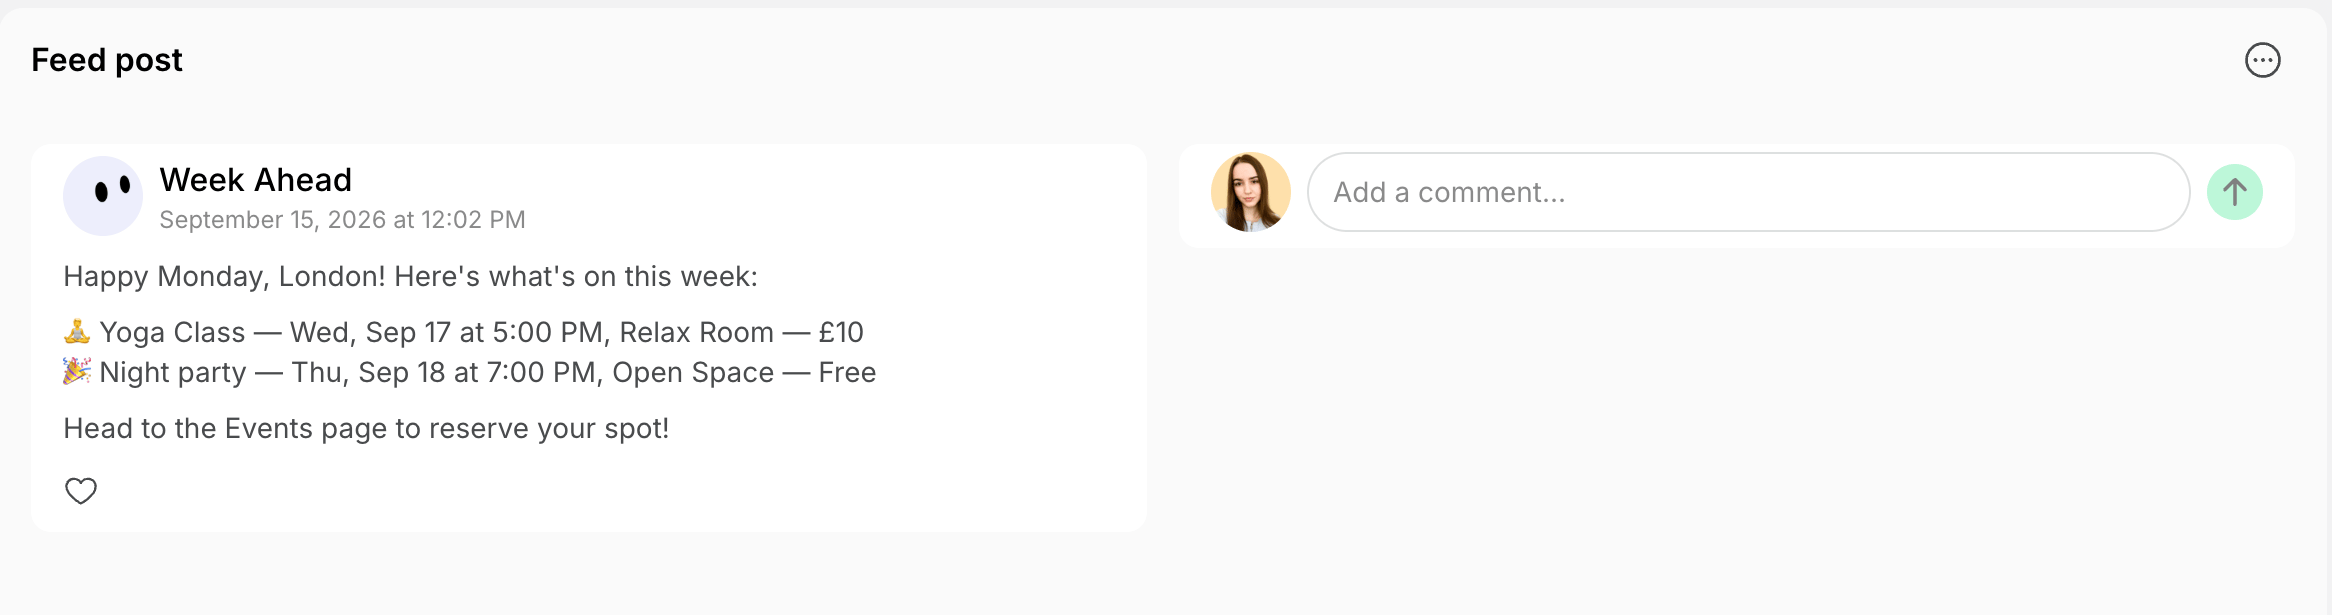
An agent is a separate user in your network, under the name and photo you gave it.- A feed post it publishes carries that name and photo, like a post from any other author.
- A chat message it sends comes from that name and photo too.
- The emails it sends go out under your network’s name, like every other Spacebring email.
Connect other apps
Connect another app, such as your CRM, so an agent can work in it: look up a deal, read a page, or create a task. Popular apps, such as Notion or Stripe, connect in one click. Any other app connects through its MCP server, and the app’s help center gives the server’s URL and how to sign in.Connect an app
- Open the agent on the Network settings > Agents page.
- In the Apps section on the right, click Connect app and choose the app, such as Notion.
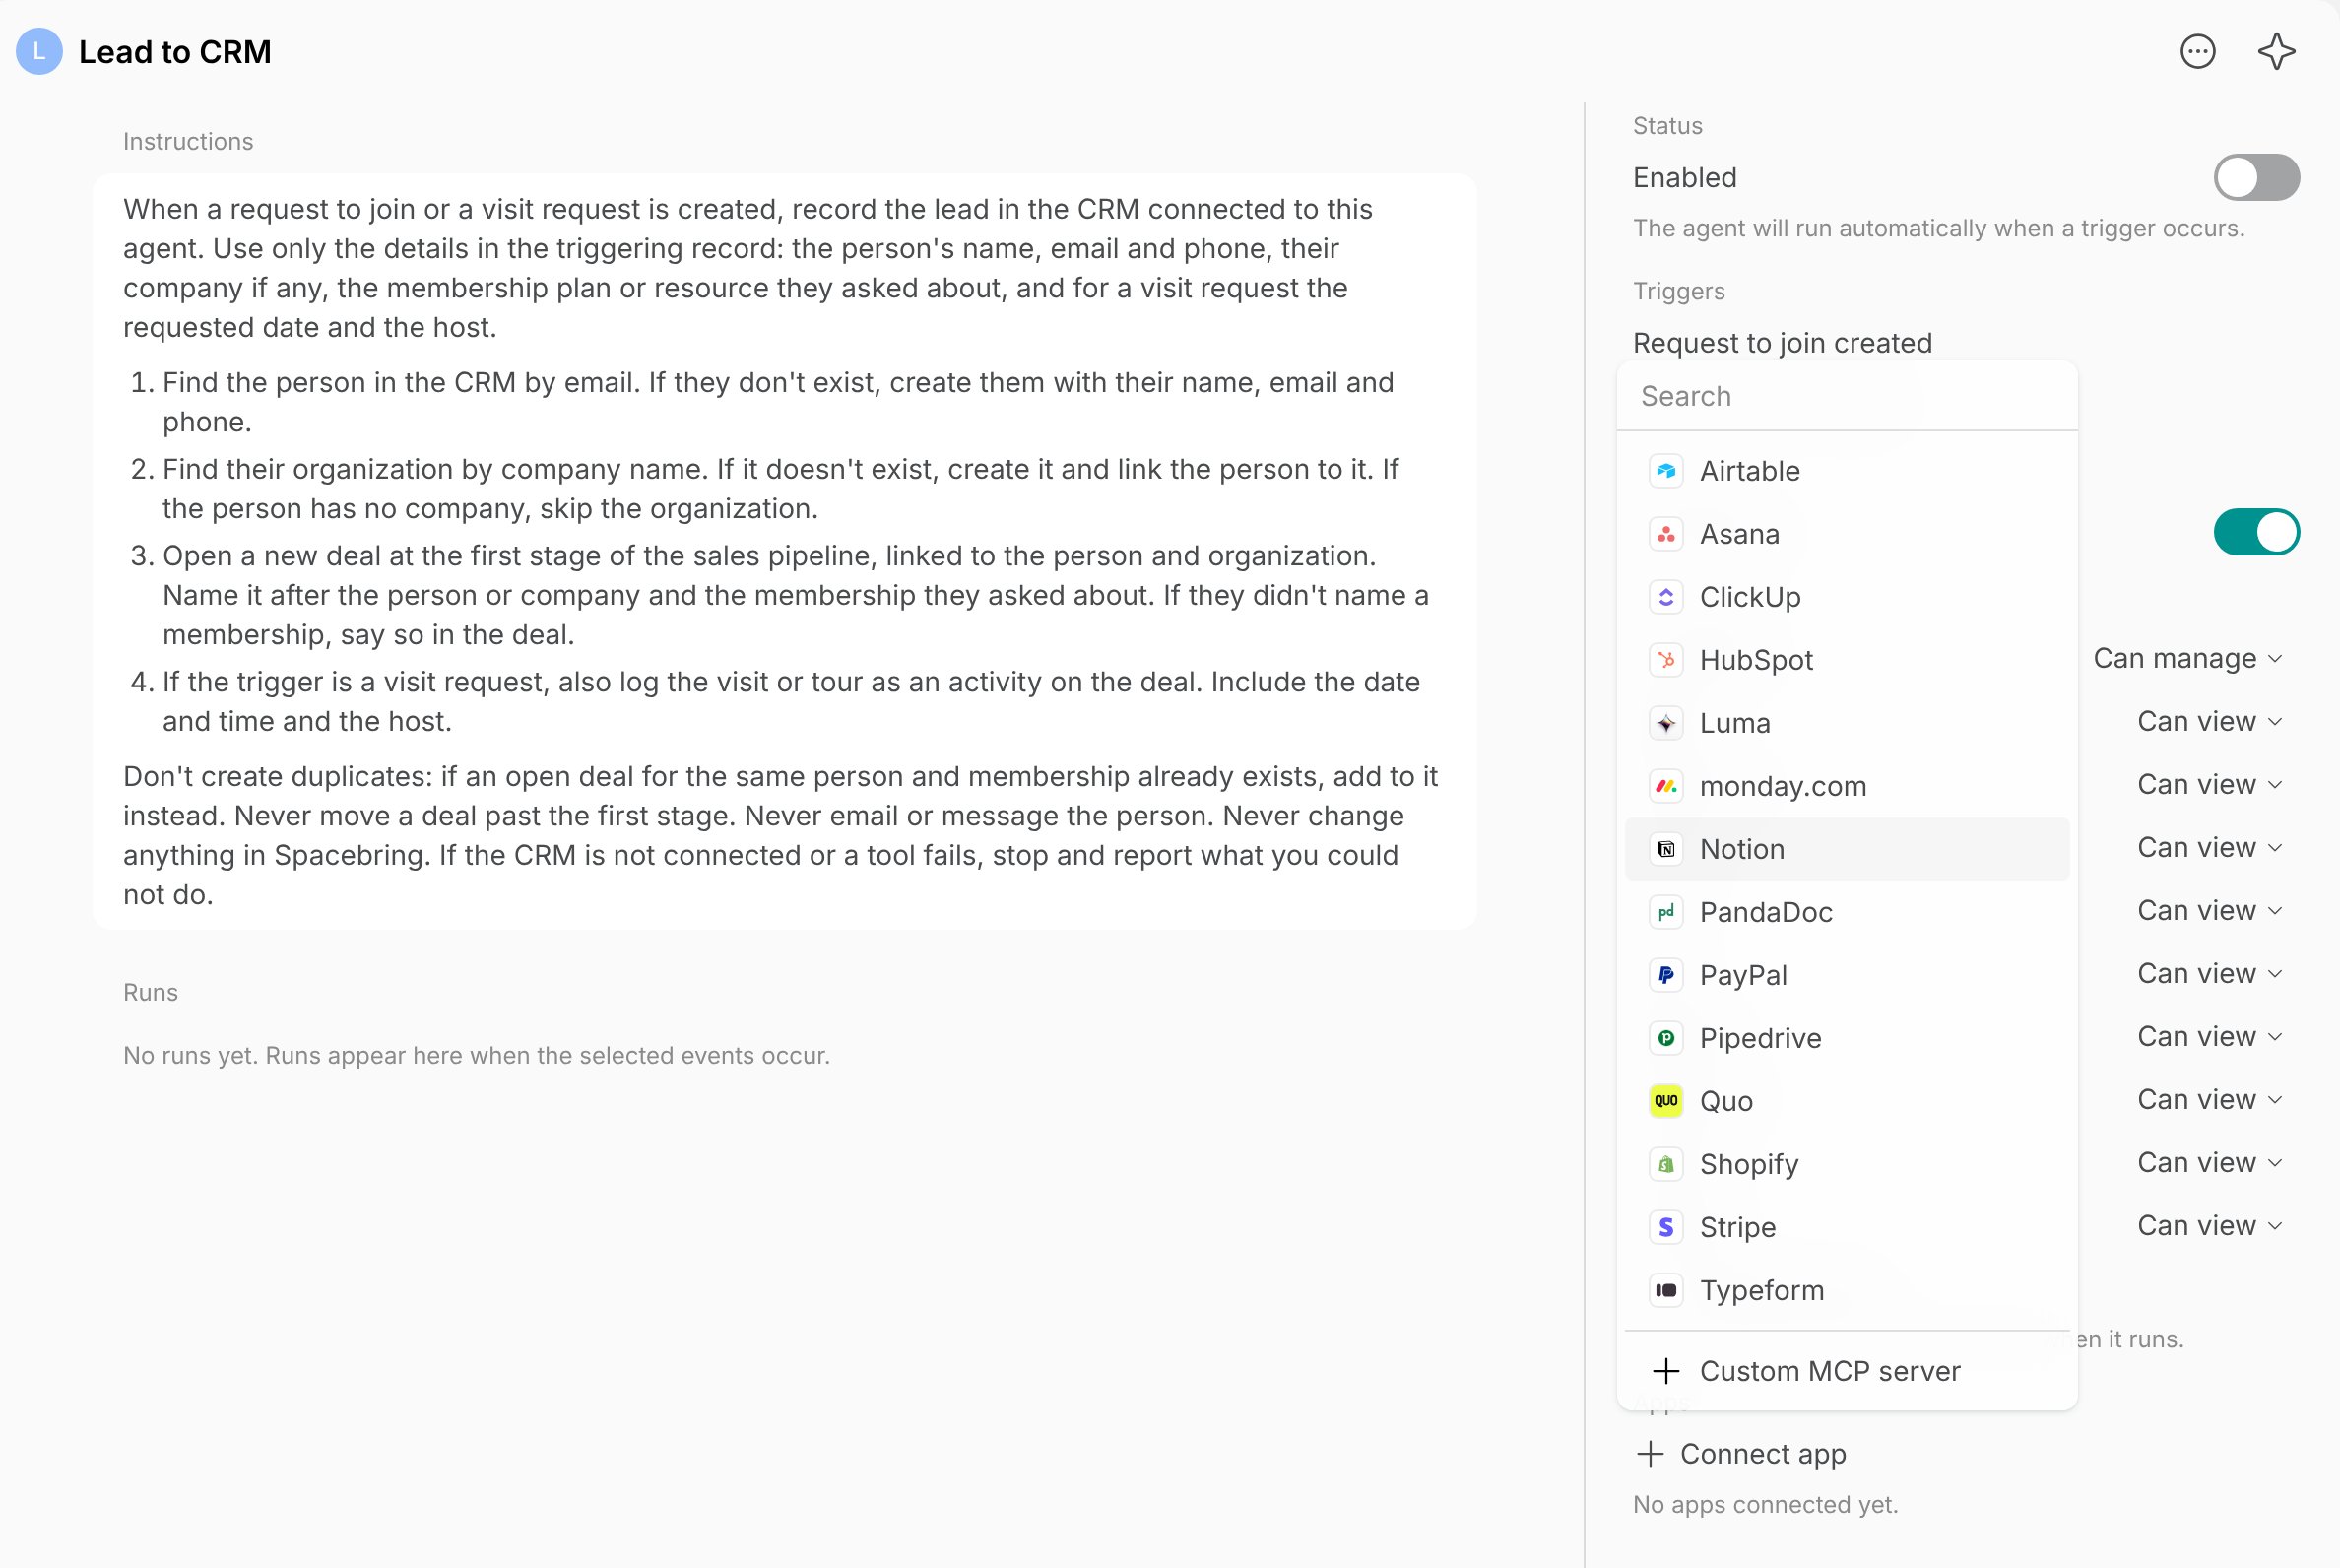
- Sign in to the app and allow access, and you come back to Spacebring.
- In the agent’s Apps section, click Connect app, then Custom MCP server.
- Enter a Name, such as “HubSpot”.
- Enter the URL of the app’s MCP server, such as
https://mcp.hubspot.com. - Optionally, in Description, say what the app is for and when the agent should use it, such as “Our CRM. Use it for leads and deals.”
- In Authentication, choose how Spacebring gets access to the app:
- OAuth sign-in — you sign in to the app on its website. Fill in Client ID and Client secret only if the app asks you to register Spacebring yourself.
- API key — enter a key you created in the app.
- API key in a custom header — enter the Header name from the app’s help center, such as
X-API-Key, and the API key. - No authentication — for an app that needs no sign-in.
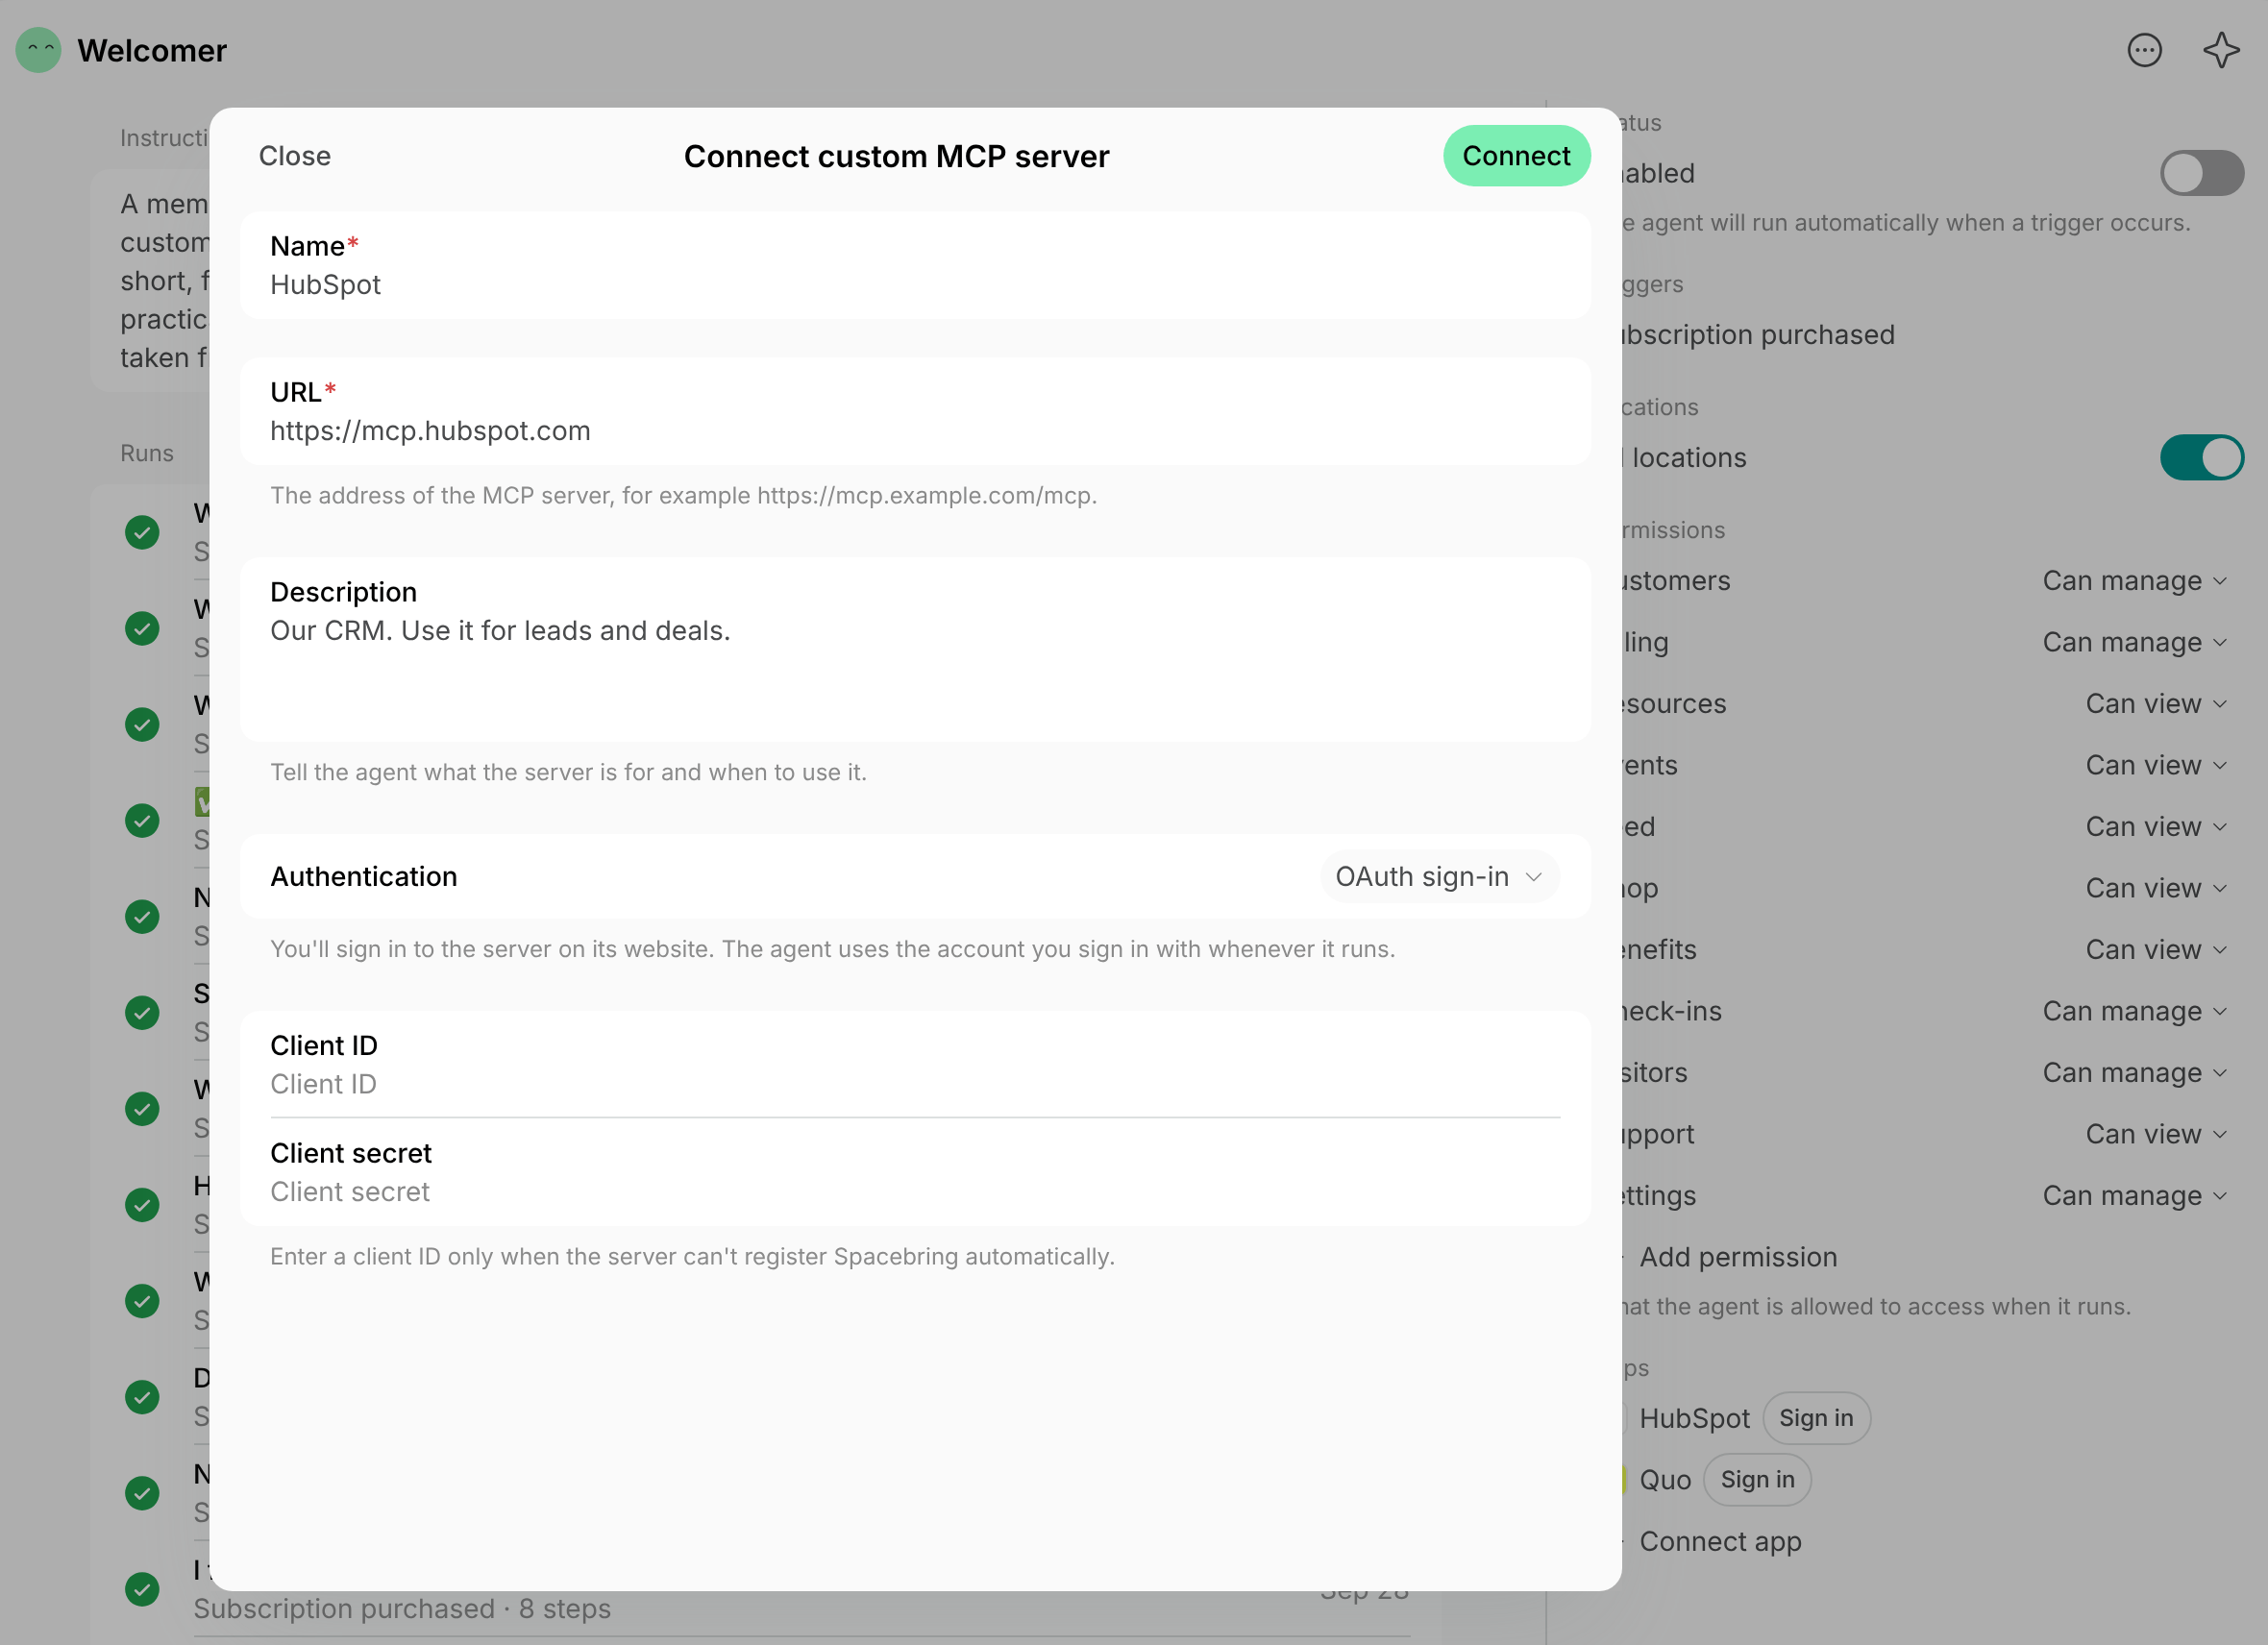
- Click Connect. For OAuth sign-in, sign in to the app and allow access, and you come back to Spacebring.
Manage connected apps
In the agent’s Apps section, point to an app and click its (…) menu:- Disable stops the agent from using the app. Enable turns it back on.
- Edit changes an MCP server’s name, URL, description, and API key. For an app connected with OAuth sign-in, you can change only the name and description.
- Disconnect for an app you chose from the list, or Delete for an MCP server, removes the app with its sign-in or API key, and this cannot be undone.
FAQs
Can I text customers, such as a link to their invoice?
Can I text customers, such as a link to their invoice?
Yes, from your Quo number. Connect Quo to Spacebring Agent to send a text when you ask in a chat, or to your custom agent to send texts on a schedule or when something happens, such as a link to the invoice on Invoice issued. Texts go to the phone number in the customer’s profile, and each one counts against your Quo messaging credits.